
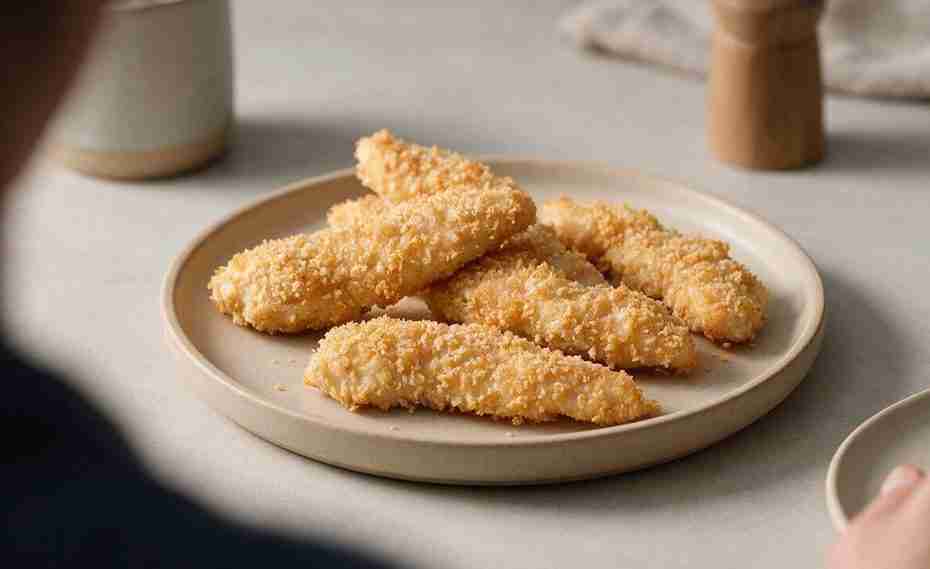
Gluten-free chicken tenders stay crisp when you combine rice flour with starch, dry the chicken well, build the coating in thin layers, rest it for 15 to 20 minutes, and cook at the right temperature. Reliable gluten-free breading depends on moisture control, firm adhesion, and steady heat rather than one special flour.
This guide explains why coatings separate, which flour and starch combinations produce a crisp crust, and how to dredge chicken without creating gummy patches. You’ll also learn how frying, baking, and air frying affect the result, plus which binders work when eggs or dairy aren’t an option.
Why Does Gluten-Free Breading Fall Off Chicken?
Gluten-free breading often falls off because it lacks the elastic proteins that help traditional wheat coatings hold together. Excess moisture, thick layers of flour, and moving the chicken too soon can weaken adhesion further.
Gluten gives wheat-based mixtures structure and elasticity. Rice flour, cornstarch, potato starch, and similar ingredients don’t behave in the same way, so you need to create adhesion through careful layering. The flour grabs the dry surface, the binder connects the layers, and the outer coating forms the crust.
Start by patting every chicken tender dry with paper towels. Surface moisture turns the first flour layer into a wet paste, which can slide away from the meat during cooking. Keep the coating thin, press it into place, and shake off loose flour after every dry dredge.
Temperature also controls how well the crust sets. Oil below the proper frying range can soak into the coating before it firms, leaving it soft and prone to separation. Excessive heat can brown or burn the outside before the chicken reaches a safe internal temperature.
What Are The Best Flours And Starches For Crispy Chicken Tenders?
A blend of white rice flour and cornstarch or potato starch gives you dependable structure and crunch. Start with two parts rice flour to one part starch, then move toward equal parts when you want a lighter, more brittle crust.
White rice flour creates a dry, neutral base without the dense texture produced by some nut flours. Cornstarch delivers a thin, crisp finish, and potato starch produces a pronounced crunch. Tapioca starch can also add crispness, but too much may create a chewy or slightly gummy coating.
Avoid assuming that every cup-for-cup gluten-free flour blend will work well for frying. Blends containing gums, several whole-grain flours, or large amounts of absorbent ingredients can become gritty or pasty. A simple rice flour and starch mixture gives you more control because you know what each ingredient contributes.
Gluten-free panko adds a coarser crunch when you want a breadcrumb-style tender. Apply it as the outer layer after the flour and binder, pressing gently so the crumbs make full contact. Check every package label because product formulas and manufacturing practices can differ.
How Do You Dredge Chicken So The Coating Stays Put?
Use a dry-wet-dry sequence: coat the dried chicken in seasoned flour, dip it in a binder, and finish with another thin flour mixture or gluten-free panko. Press the last layer onto the chicken rather than repeatedly tossing it through the bowl.
Set up separate shallow dishes for the flour mixture and binder. Season the first dry mixture so the flavor reaches the meat, then reserve a clean portion for the outer coating. Keeping the final dredge dry prevents wet clumps from building around the tenders.
Use one hand for dry ingredients and the other for the binder. This keeps your fingers from pulling the coating away and reduces large sticky lumps in the flour. Let excess binder drip back into its dish before adding the final layer, since a thick wash can cause the crust to separate in sheets.
A double dredge works well when you prefer a thicker crust, but each layer should remain thin. Repeat the binder and dry coating once, pressing gently after the last dredge. More flour doesn’t guarantee more crunch; an overloaded crust often cracks or falls away when you cut the chicken.
Why Should You Rest Breaded Chicken Before Cooking?
Resting breaded chicken for 15 to 20 minutes allows the dry ingredients to absorb moisture from the binder and attach more firmly. That short wait reduces loose flour, bare patches, and coating that slips off in the pan.
Place the coated tenders in a single layer on a rack or tray. Leave space around them and avoid stacking, since contact can pull away damp breading. During the rest, the surface should change from powdery white to lightly hydrated without becoming wet.
Don’t cover the tenders tightly during this period. Trapped moisture softens the outer layer and can make gluten-free coating gummy before cooking begins. If the breading still has very dry spots after resting, mist or brush those areas lightly with oil before baking or air frying.
The resting step matters for fried, baked, and air-fried tenders. It’s especially useful with gluten-free panko because the binder needs time to hold the larger crumbs in place. Once cooking starts, handle the chicken as little as possible until the underside has formed a firm crust.
Which Cooking Method Produces The Crispiest Coating?
Frying produces the most even crust, air frying offers concentrated browning with less oil, and baking gives you the simplest method for a larger batch. Your results still depend on spacing, oil coverage, and cooking the chicken to 165°F (74°C).
For frying, maintain an oil temperature between 350°F and 375°F (175°C and 190°C). Add only a few tenders at a time so the oil temperature doesn’t drop sharply. Let the first side set before turning, and use tongs gently so you don’t scrape away the crust.
For air fryer gluten-free chicken tenders, arrange the pieces in one layer with open space between them. Coat the surface evenly with oil spray, paying attention to pale flour patches. Turn the tenders once the first side feels firm, then spray any newly exposed dry areas before continuing.
For baked gluten-free chicken tenders, use a rack when available so hot air can circulate under the chicken. Brush or spray the coating with oil to improve browning, and avoid crowding the pan. Appliance strength and tender thickness vary, so use a meat thermometer rather than relying on appearance or a fixed cooking time.
What Can You Use Instead Of Eggs Or Dairy?
Egg-free mayonnaise, mustard, or aquafaba can bind gluten-free coating to chicken. Dairy isn’t required for the dredging process, so you can build a crisp crust without buttermilk or milk.
Spread egg-free mayonnaise in a very thin layer before applying the outer coating. Its fat supports browning, but too much can make the surface greasy and cause the flour to slide. Check the ingredient label carefully if you need to avoid eggs, gluten, or dairy.
Mustard provides good adhesion and adds a noticeable tang. Thin it slightly if it’s difficult to spread, then let the excess drip away before dredging. Aquafaba, the liquid from cooked chickpeas, works as a lighter binder and can be used much like an egg wash.
Whichever binder you choose, control the amount. The chicken should look evenly damp rather than coated in a thick paste. Rest the finished tenders for 15 to 20 minutes so the binder can hydrate the flour and starch before cooking.
Why Does Gluten-Free Coating Turn Gummy, Gritty, Or Soggy?
Gummy coating usually comes from too much liquid, overly absorbent flour blends, or thick layers that can’t dry during cooking. Gritty coating often points to coarse flour, and sogginess develops when steam or oil remains trapped around the crust.
If the coating feels gummy, simplify the flour blend. Use white rice flour with cornstarch or potato starch, limit ingredients that contain gums, and let excess binder drain before the second dredge. Thin layers cook more evenly and release moisture faster than thick, dough-like patches.
If your tenders start crisp but soften soon after cooking, move them to a wire rack instead of a flat plate. A plate traps steam beneath the chicken, and paper towels can hold moisture against the crust. Keep the tenders in a single layer and avoid covering them while they’re hot.
If the breading burns before the center cooks, check the cooking temperature and the thickness of the chicken. Keep frying oil within 350°F to 375°F, and use similarly sized tenders so they finish at close to the same time. Remove each piece when its internal temperature reaches 165°F rather than extending cooking for extra color.
How Do You Make Crispy Gluten-Free Chicken Tenders?
Build the recipe around a two-part rice flour to one-part starch mixture, a thin binder, and a 15 to 20 minute rest. This flexible method works with frying, baking, or air frying and doesn’t depend on a commercial all-purpose blend.
Prepare The Coating: Combine two parts white rice flour with one part cornstarch or potato starch. Season the mixture to suit your meal. If you want a breadcrumb crust, place certified gluten-free panko in a separate shallow dish for the last layer.
- Pat the chicken tenders dry.
- Coat each tender lightly in the seasoned flour mixture.
- Dip it in beaten egg or your chosen egg-free binder.
- Apply another thin flour layer or press it into gluten-free panko.
- Rest the coated chicken for 15 to 20 minutes.
- Cook without crowding until the coating is crisp and the chicken reaches 165°F.
Choose The Cooking Method: Fry at 350°F to 375°F, mist air-fried tenders with oil, or bake them on a rack with oil applied to the coating. Turn the chicken only after the first side has set. Transfer cooked tenders to a wire rack so escaping steam doesn’t soften the bottom crust.
If gluten exposure is a concern, check the labels on flour, starch, seasonings, binders, breadcrumbs, and oil. Use clean bowls, utensils, pans, racks, and preparation surfaces. Shared fryers can contain crumbs from wheat-based foods, so use fresh oil in a clean vessel when needed.
How Do You Keep Gluten-Free Breading From Falling Off?
- Use rice flour with cornstarch or potato starch.
- Pat chicken dry, dredge in flour, dip in egg, then coat again.
- Rest breaded tenders for 15 to 20 minutes.
- Fry at 350°F to 375°F, or air fry with oil spray.
Make Every Layer Work For You
Crisp chicken tenders come from a chain of small choices: a dry surface, a balanced flour and starch blend, thin dredging layers, a suitable binder, and enough resting time. Match the cooking method to the texture you want, then manage heat and spacing instead of adding more breading. Use a thermometer to confirm the chicken reaches 165°F, and cool the cooked tenders on a rack to protect the crust. Once you control moisture and temperature, gluten-free breading becomes far more predictable and stays attached from the first bite to the last.
References
- Celiac Disease Foundation: What Is Gluten?
- King Arthur Baking: Gluten-Free Flour Guide
- Bob’s Red Mill: How to Make Gluten-Free Fried Chicken
- America’s Test Kitchen: Why You Should Rest Breaded Chicken Before Frying
- Serious Eats: Guide to Crispy Fried Chicken
- United States Department of Agriculture Food Safety and Inspection Service: Safe Minimum Internal Temperature Chart
- Kikkoman USA: Gluten-Free Panko
- Gluten-Free on a Shoestring: Gluten-Free Fried Chicken.